
Course Tour
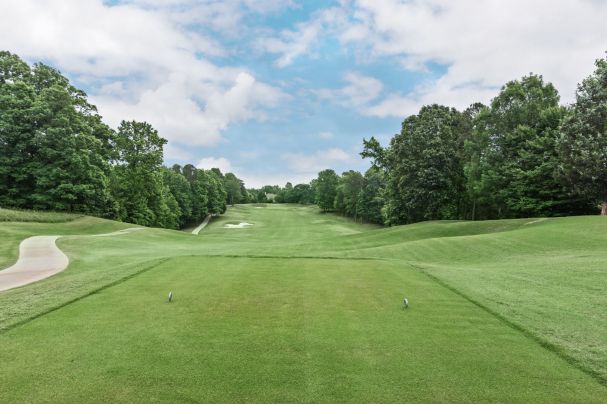
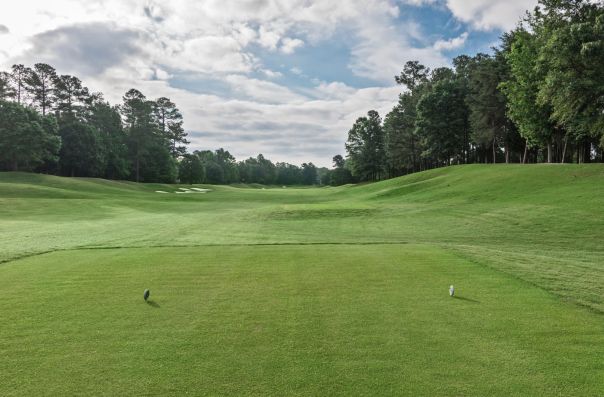
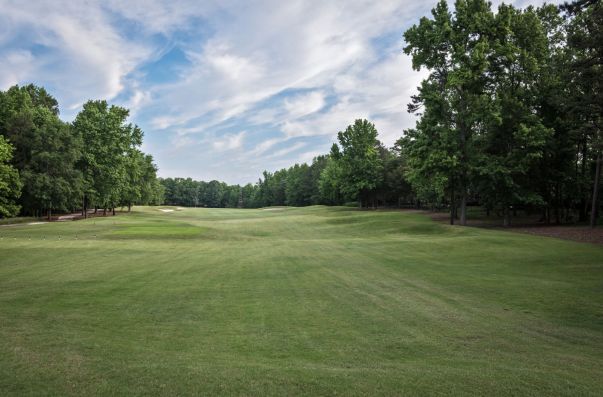
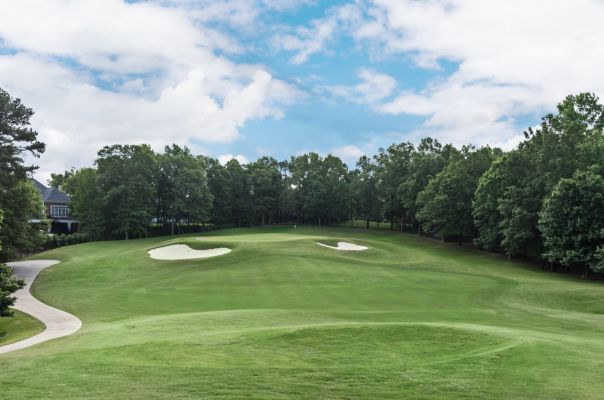
Hole 1
The opening hole requires a tee shot that avoids the left side fairway bunker, 222 yards to reach, 246 yards to carry. But be careful, right of the fairway will leave a difficult approach over a front greenside bunker. The tee shot plays downhill and the second shot plays uphill to the green.
Men’s Par, Yardage, and Handicap Information
| CATEGORY | PAR | YARDAGE | STROKE PLAY HANDICAP |
| Black | 4 | 391 | 9 |
| Gold | 4 | 371 | 9 |
| Blue | 4 | 371 | 9 |
| White | 4 | 352 | 9 |
| Omega (Hybrid) | 4 | 352 | 9 |
| Jones (Hybrid) | 4 | 352 | 9 |
Women’s Par, Yardage, and Handicap Information
| CATEGORY | PAR | YARDAGE | STROKE PLAY HANDICAP |
| Yellow | 4 | 285 | 13 |
| Red | 4 | 285 | 13 |
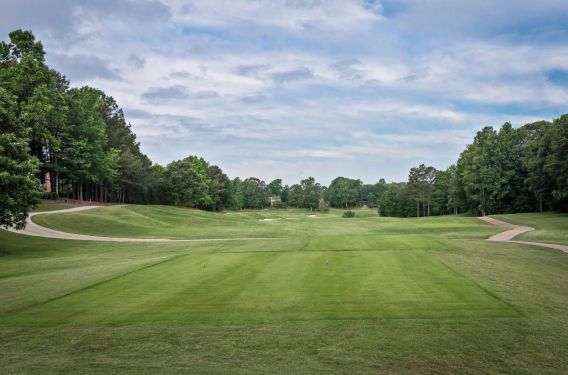
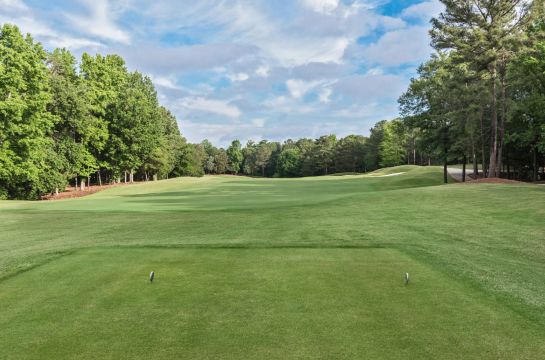
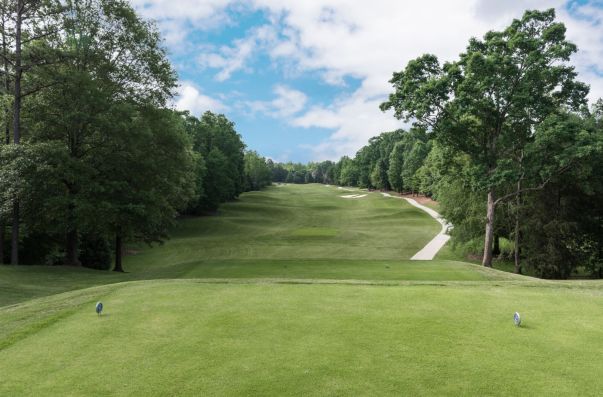
Hole 2
This short par 4 seems harmless enough but avoid the lateral water hazard to the right. A tee shot in excess of 245 yards will be beyond the left and right bunkers and widen the landing area but will likely leave a downhill lie. Play to the flat area of the fairway between the bunkers and face a longer shot to the green that slopes from left to right and back to front.
Men’s Par, Yardage, and Handicap Information
| CATEGORY | PAR | YARDAGE | STROKE PLAY HANDICAP |
| Black | 4 | 358 | 13 |
| Gold | 4 | 342 | 13 |
| Blue | 4 | 342 | 13 |
| White | 4 | 329 | 13 |
| Omega (Hybrid) | 4 | 329 | 13 |
| Jones (Hybrid) | 4 | 329 | 13 |
Women’s Par, Yardage, and Handicap Information
| CATEGORY | PAR | YARDAGE | STROKE PLAY HANDICAP |
| Yellow | 4 | 271 | 9 |
| Red | 4 | 271 | 9 |
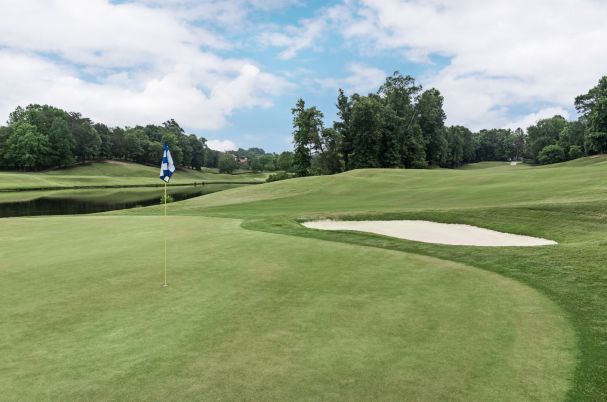
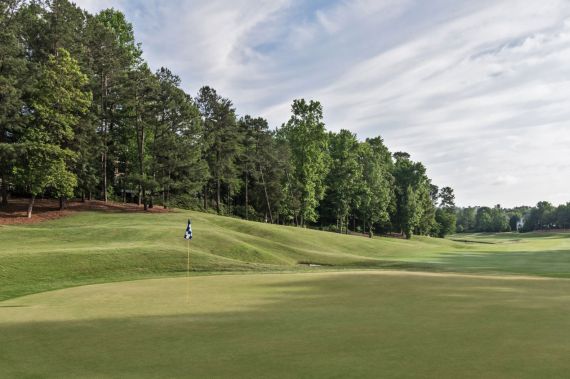
Hole 3
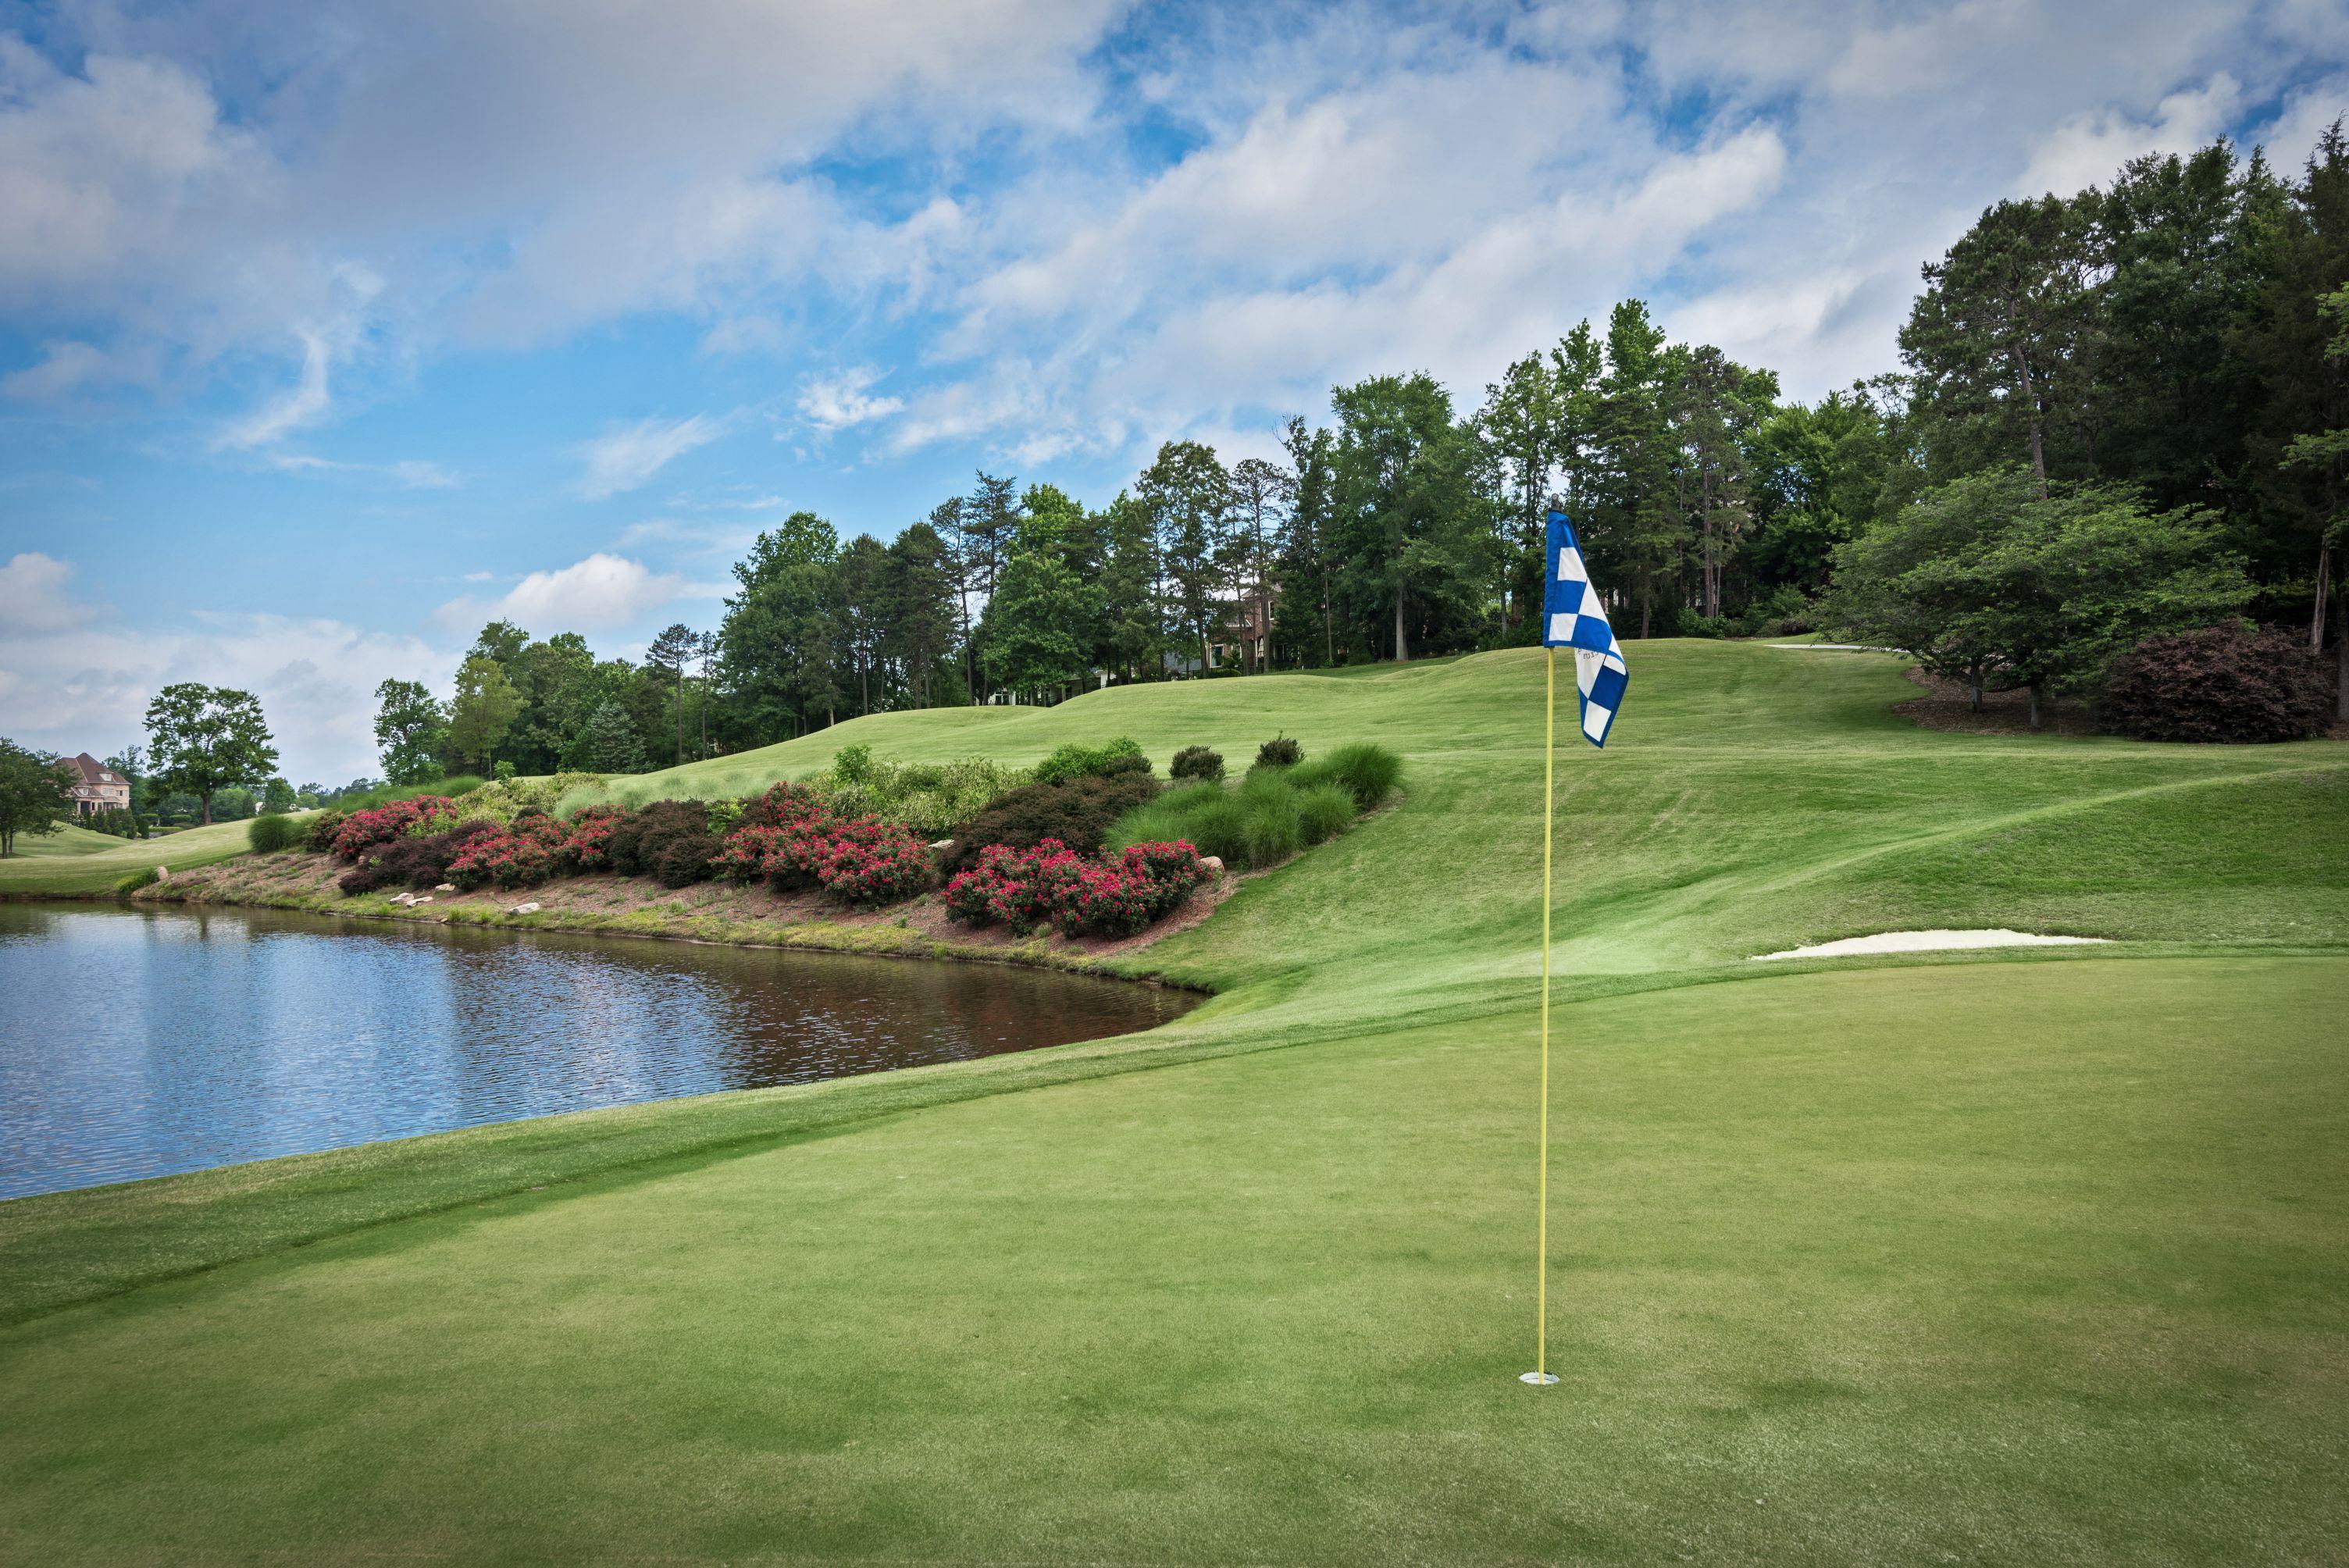
Don’t be fooled by the handicap. This par 3 has water short and right. Make sure you have enough club to clear the water but expect a tricky downhill putt if you go past the pin. The lone bunker in the back left will be a difficult up and down to any hole location.
Men’s Par, Yardage, and Handicap Information
| CATEGORY | PAR | YARDAGE | STROKE PLAY HANDICAP |
| Black | 3 | 179 | 17 |
| Gold | 3 | 160 | 17 |
| Blue | 3 | 160 | 17 |
| White | 3 | 129 | 17 |
| Omega (Hybrid) | 3 | 129 | 17 |
| Jones (Hybrid) | 3 | 129 | 17 |
Women’s Par, Yardage, and Handicap Information
| CATEGORY | PAR | YARDAGE | STROKE PLAY HANDICAP |
| Yellow | 3 | 97 | 17 |
| Red | 3 | 97 | 17 |
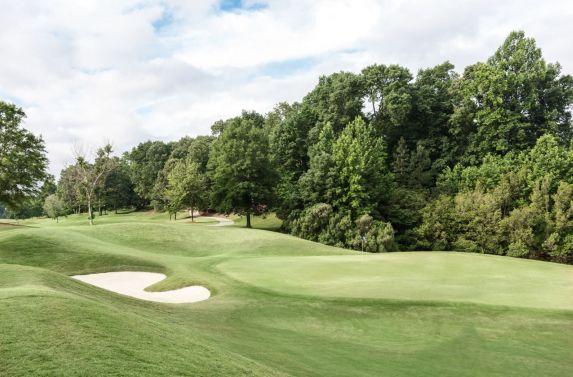
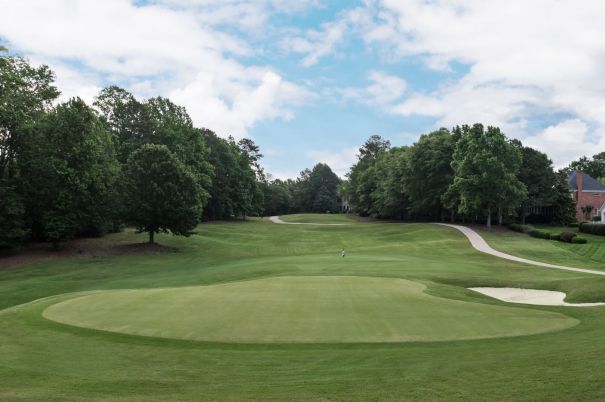
Hole 4
A good drive that avoids the right bunker, 245 yard carry and left bunker, 239 yard carry, leaves a mid to short iron approach. The second shot is slightly uphill to a green that is guarded on all sides by bunkers. The green slopes back to front and right to left in the front.
Men’s Par, Yardage, and Handicap Information
| CATEGORY | PAR | YARDAGE | STROKE PLAY HANDICAP |
| Black | 4 | 376 | 7 |
| Gold | 4 | 360 | 7 |
| Blue | 4 | 339 | 7 |
| White | 4 | 307 | 7 |
| Omega (Hybrid) | 4 | 307 | 7 |
| Jones (Hybrid) | 4 | 307 | 7 |
Women’s Par, Yardage, and Handicap Information
| CATEGORY | PAR | YARDAGE | STROKE PLAY HANDICAP |
| Yellow | 4 | 270 | 7 |
| Red | 4 | 270 | 7 |
Hole 5
Favor the right side of the fairway to avoid the series of bunkers on the left off the tee. A good drive will leave longer players with a chance to get home in 2, or lay up for a short approach. Avoiding the sand and finding the correct level of this two tiered green should result in a good chance for birdie.
Men’s Par, Yardage, and Handicap Information
| CATEGORY | PAR | YARDAGE | STROKE PLAY HANDICAP |
| Black | 5 | 533 | 5 |
| Gold | 5 | 517 | 5 |
| Blue | 5 | 499 | 5 |
| White | 5 | 499 | 5 |
| Omega (Hybrid) | 5 | 443 | 5 |
| Jones (Hybrid) | 5 | 443 | 5 |
Women’s Par, Yardage, and Handicap Information
| CATEGORY | PAR | YARDAGE | STROKE PLAY HANDICAP |
| Yellow | 5 | 443 | 1 |
| Red | 5 | 411 | 1 |
Hole 6
The longest par 4 on the front nine is also lined with fairway bunkers on the left. Miss the fairway and 5 is a good score. Hit the fairway and you are left with a long, slightly downhill shot to a green that is open in front and slopes back to front. Par is always a good score here.
Men’s Par, Yardage, and Handicap Information
| CATEGORY | PAR | YARDAGE | STROKE PLAY HANDICAP |
| Black | 4 | 467 | 1 |
| Gold | 4 | 449 | 1 |
| Blue | 4 | 430 | 1 |
| White | 4 | 384 | 1 |
| Omega (Hybrid) | 4 | 384 | 1 |
| Jones (Hybrid) | 4 | 384 | 1 |
Women’s Par, Yardage, and Handicap Information
| CATEGORY | PAR | YARDAGE | STROKE PLAY HANDICAP |
| Yellow | 4 | 384 | 3 |
| Red | 4 | 319 | 3 |
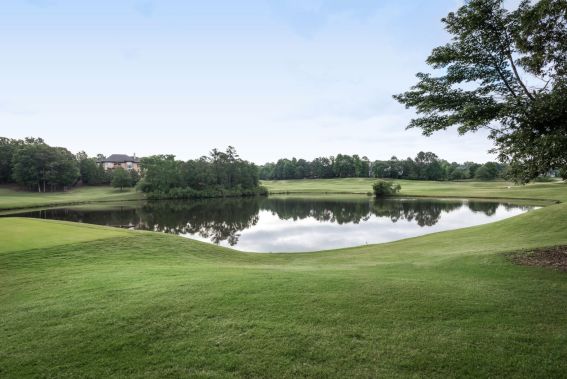
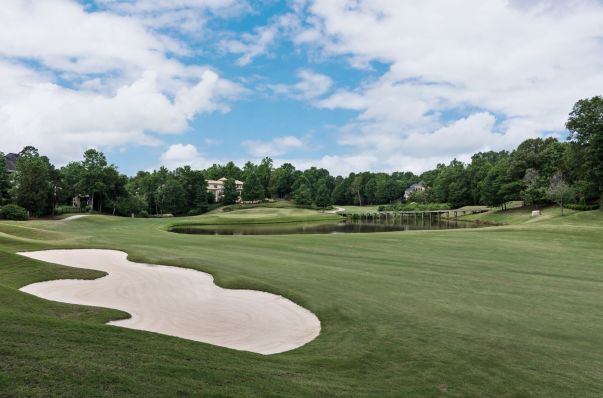
Hole 7
A well placed tee shot is the key to success on this dogleg right hole. A slight fade that avoids the right side fairway bunker is ideal. Check the wind carefully before trying to carry the water, but a drive over the pond makes the hole reachable in 2 for a big hitter. The second and third shots play uphill to a green that is guarded by two front bunkers.
Men’s Par, Yardage, and Handicap Information
| CATEGORY | PAR | YARDAGE | HANDICAP |
| Black | 5 | 575 | 3 |
| Gold | 5 | 553 | 3 |
| Blue | 5 | 530 | 3 |
| White | 5 | 465 | 3 |
| Omega (Hybrid) | 5 | 465 | 3 |
| Jones (Hybrid) | 5 | 465 | 3 |
Women’s Par, Yardage, and Handicap Information
| CATEGORY | PAR | YARDAGE | HANDICAP |
| Yellow | 5 | 465 | 5 |
| Red | 5 | 366 | 5 |
Hole 8
The second par 3 on the front nine plays slightly downhill. Forget the pin and play to the center or back center of this green. The green is very narrow in the front and shots finding the front left bunker or collection area to the front right will make for very difficult saves. Pars usually “pick one up on the field”.
Men’s Par, Yardage, and Handicap Information
| CATEGORY | PAR | YARDAGE | STROKE PLAY HANDICAP |
| Black | 3 | 208 | 15 |
| Gold | 3 | 190 | 15 |
| Blue | 3 | 168 | 15 |
| White | 3 | 168 | 15 |
| Omega (Hybrid) | 3 | 130 | 15 |
| Jones (Hybrid) | 3 | 130 | 15 |
Women’s Par, Yardage, and Handicap Information
| CATEGORY | PAR | YARDAGE | STROKE PLAY HANDICAP |
| Yellow | 3 | 130 | 15 |
| Red | 3 | 130 | 15 |
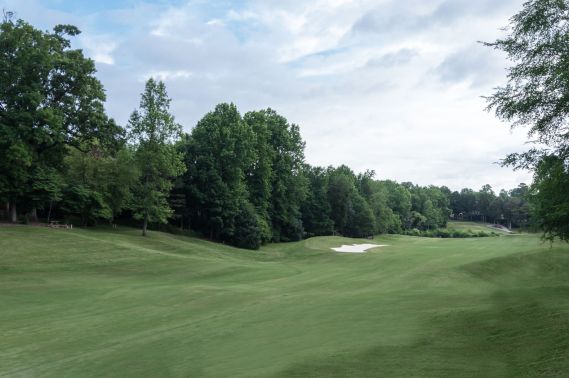
Hole 9
Driving the ball in the fairway is essential to play this narrow Par 4. A slight draw, started just inside the right bunker is ideal. Longer hitters can reach the down slope at 260 yards and possibly make it all the way to a level lie. The second shot plays downhill to a green that slopes back to front and right to left. There are no easy bunker shots here, but especially avoid the deep right front bunker.
Men’s Par, Yardage, and Handicap Information
| CATEGORY | PAR | YARDAGE | STROKE PLAY HANDICAP |
| Black | 4 | 420 | 11 |
| Gold | 4 | 406 | 11 |
| Blue | 4 | 386 | 11 |
| White | 4 | 386 | 11 |
| Omega (Hybrid) | 4 | 311 | 11 |
| Jones (Hybrid) | 4 | 311 | 11 |
Women’s Par, Yardage, and Handicap Information
| CATEGORY | PAR | YARDAGE | STROKE PLAY HANDICAP |
| Yellow | 4 | 311 | 11 |
| Red | 4 | 289 | 11 |
Hole 10
Aim just left of the right bunkers and hit a slight draw to have ideal position on this difficult par 4. The second shot plays downhill and this green is low in the front and high on the left and right and in back, making selecting the right club critical. Find one of the four bunkers guarding this green and par will be hard work.
Men’s Par, Yardage, and Handicap Information
| CATEGORY | PAR | YARDAGE | HANDICAP | HANDICAP MATCH | PLAYHANDICAP | STROKE PLAY |
| Black | 4 | 411 | 3 | 1 | 3 | |
| Gold | 4 | 394 | 3 | 1 | 3 | |
| Blue | 4 | 379 | 3 | 1 | 3 | |
| White | 4 | 370 | 3 | 1 | 3 | |
| Jones | 4 | 370 | 3 | 1 | 3 |
Women’s Par, Yardage, and Handicap Information
| CATEGORY | PAR | YARDAGE | HANDICAP | HANDICAP MATCH | PLAYHANDICAP | STROKE PLAY |
| Yellow | 4 | 318 | 10 | |||
| Red | 4 | 284 | 10 |

Hole 11
A great risk/reward hole. Longer hitters can go over the fairway bunker if they can carry the tee shot 250 yards downhill. From there, a 220 yard shot to a narrow green must avoid the water on the left and the steep bank on the right. If you lay up, stay back and left of the 100 yard marker for your best lie and to avoid the water that cuts in front of the green. The green slopes slightly toward you in the front and away from you in the center.
Men’s Par, Yardage, and Handicap Information
| CATEGORY | PAR | YARDAGE | HANDICAP | HANDICAP MATCH | PLAYHANDICAP | STROKE PLAY |
| Black | 5 | 504 | 7 | 7 | 17 | |
| Gold | 5 | 483 | 7 | 7 | 17 | |
| Blue | 5 | 483 | 7 | 7 | 17 | |
| White | 5 | 463 | 7 | 7 | 17 | |
| Jones | 5 | 463 | 7 | 7 | 17 |
Women’s Par, Yardage, and Handicap Information
| CATEGORY | PAR | YARDAGE | HANDICAP | HANDICAP MATCH | PLAYHANDICAP | STROKE PLAY |
| Yellow | 5 | 421 | 8 | |||
| Red | 5 | 421 | 8 |

Hole 12
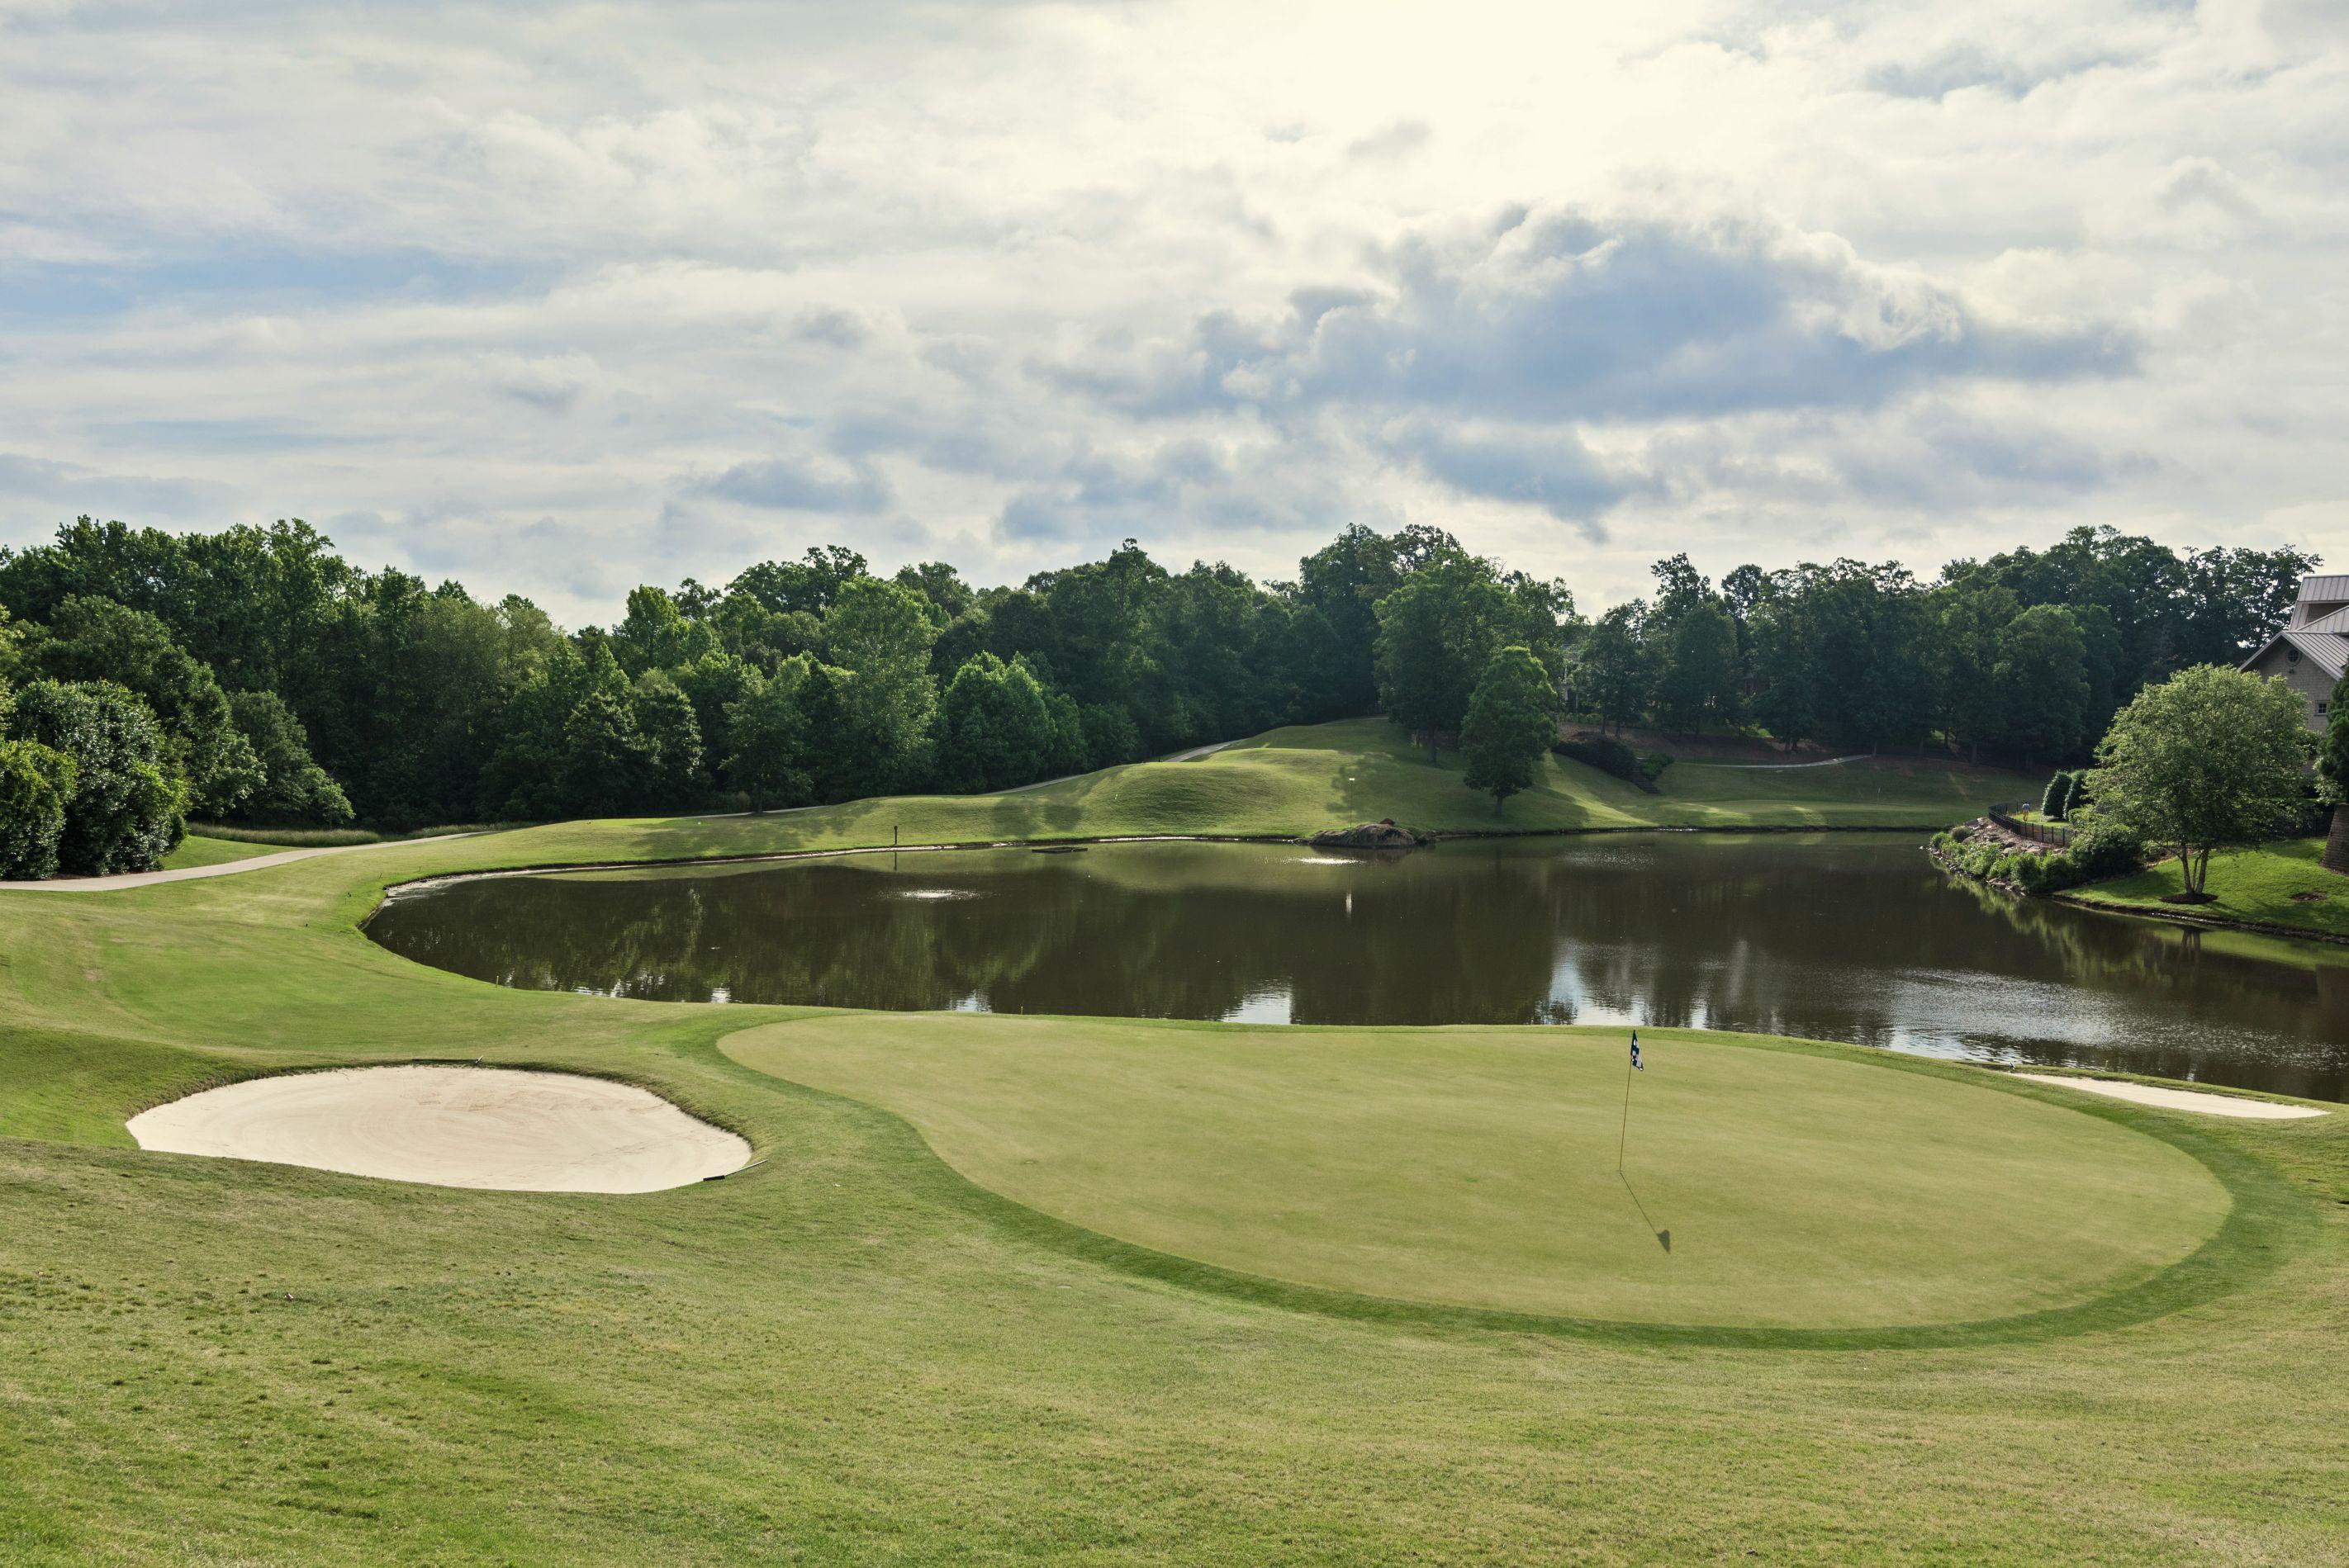
Club selection is crucial on this downhill Par 3 over the water. Check the wind closely and make a good swing to avoid the bunkers on each side and clear the lake.
Men’s Par, Yardage, and Handicap Information
| CATEGORY | PAR | YARDAGE | HANDICAP | HANDICAP MATCH | PLAYHANDICAP | STROKE PLAY |
| Black | 3 | 184 | 17 | 17 | 15 | |
| Gold | 3 | 158 | 17 | 17 | 15 | |
| Blue | 3 | 141 | 17 | 17 | 15 | |
| White | 3 | 120 | 17 | 17 | 15 | |
| Jones | 3 | 120 | 17 | 17 | 15 |
Women’s Par, Yardage, and Handicap Information
| CATEGORY | PAR | YARDAGE | HANDICAP | HANDICAP MATCH | PLAYHANDICAP | STROKE PLAY |
| Yellow | 3 | 105 | 16 | |||
| Red | 3 | 105 | 16 |
Hole 13
A good tee shot here is right of the bunkers, and just short of the pond, leaving a mid to short iron to an undulating green that slopes severely from back to front. Aim for the middle of the green to avoid a big mistake on this short hole. The yardage looks like a birdie hole but par is a good score.
Men’s Par, Yardage, and Handicap Information
| CATEGORY | PAR | YARDAGE | HANDICAP | HANDICAP MATCH | PLAYHANDICAP | STROKE PLAY |
| Black | 4 | 360 | 13 | 13 | 13 | |
| Gold | 4 | 346 | 13 | 13 | 13 | |
| Blue | 4 | 331 | 13 | 13 | 13 | |
| White | 4 | 313 | 13 | 13 | 13 | |
| Jones | 4 | 313 | 13 | 13 | 13 |
Women’s Par, Yardage, and Handicap Information
| CATEGORY | PAR | YARDAGE | HANDICAP | HANDICAP MATCH | PLAYHANDICAP | STROKE PLAY |
| Yellow | 4 | 253 | 6 | |||
| Red | 4 | 253 | 6 |
Hole 14
Try to avoid the right bunker on this long Par 4 to leave a slightly uphill second shot to a green that is guarded on both sides by bunkers. Sand saves are rare and two putts from the wrong area of the green are difficult.
Men’s Par, Yardage, and Handicap Information
| CATEGORY | PAR | YARDAGE | HANDICAP | HANDICAP MATCH | PLAYHANDICAP | STROKE PLAY |
| Black | 4 | 441 | 5 | 5 | 5 | |
| Gold | 4 | 424 | 5 | 5 | 5 | |
| Blue | 4 | 404 | 5 | 5 | 5 | |
| White | 4 | 404 | 5 | 5 | 5 | |
| Jones | 4 | 301 | 5 | 5 | 5 |
Women’s Par, Yardage, and Handicap Information
| CATEGORY | PAR | YARDAGE | HANDICAP | HANDICAP MATCH | PLAYHANDICAP | STROKE PLAY |
| Yellow | 4 | 253 | 6 | |||
| Red | 4 | 253 | 6 |
Hole 15
The hardest hole on the course, #15 will require a tee shot that avoids the long bunker on the left, and the mounds on the right. Hit the fairway and you are left with a long, slightly down hill second shot, to green that slopes severely from back to front. The three bunkers guarding the green are well below the putting surface, making sand saves infrequent.
Men’s Par, Yardage, and Handicap Information
| CATEGORY | PAR | YARDAGE | HANDICAP | HANDICAP MATCH | PLAYHANDICAP | STROKE PLAY |
| Black | 4 | 459 | 1 | 3 | 1 | |
| Gold | 4 | 443 | 1 | 3 | 1 | |
| Blue | 4 | 421 | 1 | 3 | 1 | |
| White | 4 | 358 | 1 | 3 | 1 | |
| Jones | 4 | 358 | 1 | 3 | 1 |
Women’s Par, Yardage, and Handicap Information
| CATEGORY | PAR | YARDAGE | HANDICAP | HANDICAP MATCH | PLAYHANDICAP | STROKE PLAY |
| Yellow | 4 | 358 | 4 | |||
| Red | 4 | 296 | 4 |

Hole 16
Bunkers guard both sides of this fairway. You may think of driving over the right side bunker but that is a risky play. It will require a carry of 268 yards and the fairway slopes hard to the right towards the creek. Stay to the center of the fairway on the plateau and be left with a short, downhill shot to a green that is guarded in front and left by sand and on the right by water. Hit the right section of the green to be left with a good chance for birdie.
Men’s Par, Yardage, and Handicap Information
| CATEGORY | PAR | YARDAGE | HANDICAP | HANDICAP MATCH | PLAYHANDICAP | STROKE PLAY |
| Black | 4 | 400 | 11 | 11 | 7 | |
| Gold | 4 | 389 | 11 | 11 | 7 | |
| Blue | 4 | 377 | 11 | 11 | 7 | |
| White | 4 | 362 | 11 | 11 | 7 | |
| Jones | 4 | 362 | 11 | 11 | 7 |
Women’s Par, Yardage, and Handicap Information
| CATEGORY | PAR | YARDAGE | HANDICAP | HANDICAP MATCH | PLAYHANDICAP | STROKE PLAY |
| Yellow | 4 | 267 | 12 | |||
| Red | 4 | 267 | 12 |

Hole 17
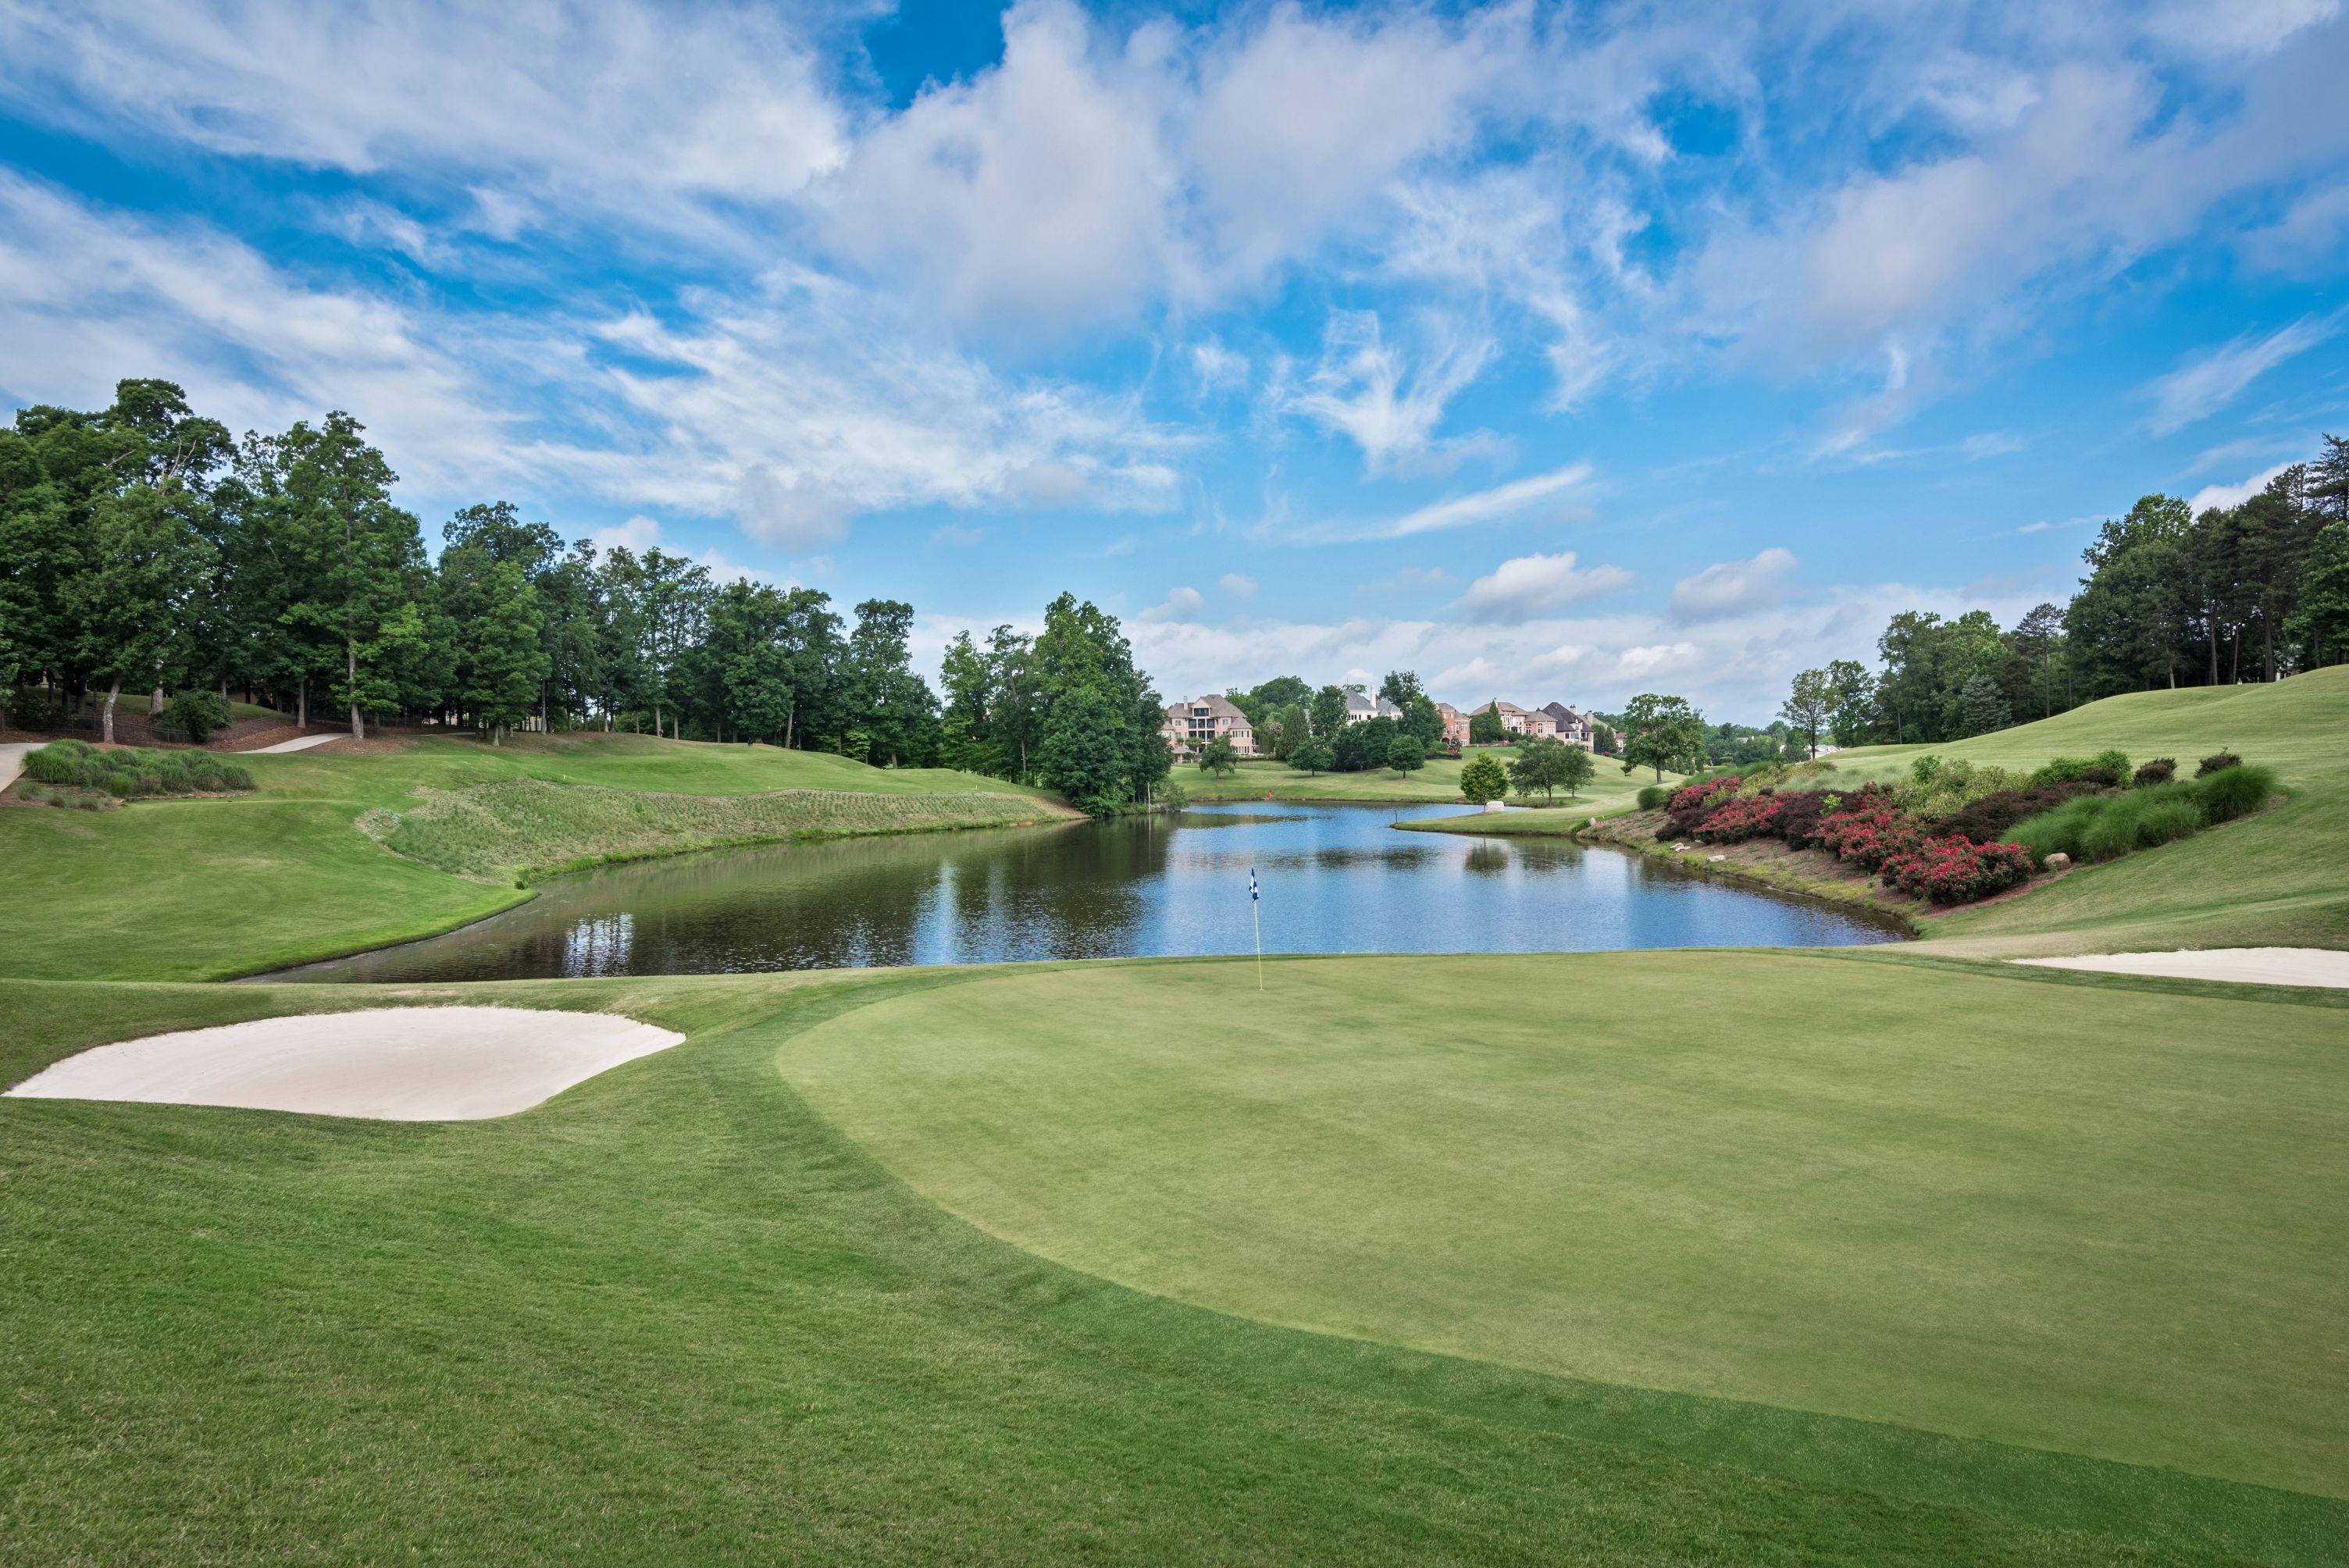
This downhill par 3 plays entirely over water so take plenty of club. The green slopes severely from back to front, especially in the back. Even the shortest of putts are a challenge here. The bunkers that guard the front left and right will require a great shot to save par.
Men’s Par, Yardage, and Handicap Information
| CATEGORY | PAR | YARDAGE | HANDICAP | HANDICAP MATCH | PLAYHANDICAP | STROKE PLAY |
| Black | 3 | 193 | 15 | 15 | 9 | |
| Gold | 3 | 177 | 15 | 15 | 9 | |
| Blue | 3 | 172 | 15 | 15 | 9 | |
| White | 3 | 159 | 15 | 15 | 9 | |
| Jones | 3 | 120 | 15 | 15 | 9 |
Women’s Par, Yardage, and Handicap Information
| CATEGORY | PAR | YARDAGE | HANDICAP | HANDICAP MATCH | PLAYHANDICAP | STROKE PLAY |
| Yellow | 3 | 120 | 18 | |||
| Red | 3 | 87 | 18 |
Hole 18
This long, narrow par 5 requires a tee shot that avoids the fairway bunker on the right and stays out of the mounds on the left. Stay right of the left fairway bunker on the second shot and have a short iron left to the green. The green is sloped from back to front with a slight two tier effect in the center. A bunker guards the right and one of the largest bunkers on the course wraps around the left side of the green. Keep it in the fairway and hit the right level of the green to give yourself a chance to make the putt.
Men’s Par, Yardage, and Handicap Information
| CATEGORY | PAR | YARDAGE | HANDICAP | HANDICAP MATCH | PLAYHANDICAP | STROKE PLAY |
| Black | 5 | 556 | 9 | 9 | 11 | |
| Gold | 5 | 539 | 9 | 9 | 11 | |
| Blue | 5 | 539 | 9 | 9 | 11 | |
| White | 5 | 521 | 9 | 9 | 11 | |
| Jones | 5 | 467 | 9 | 9 | 11 |
Women’s Par, Yardage, and Handicap Information
| CATEGORY | PAR | YARDAGE | HANDICAP | HANDICAP MATCH | PLAYHANDICAP | STROKE PLAY |
| Yellow | 5 | 467 | 2 | |||
| Red | 5 | 400 | 2 |